Hello friends,
I am so excited to share this gluten-free sourdough recipe with you. When I ventured into this whole complicated world of gluten-free bread making a couple of months back, I'll admit it was overwhelming. There are thousands of recipes for gluten-free sourdough on the internet, each different and each swearing by specific ingredients that make all the difference. I tried a few and actually got pretty good results. Then I got my mum into it, and then some friends, and well, between us, we found the perfect recipe. I’ve since tweaked it for my own purposes with a bit of experimenting and using the flours we have available here in New Zealand. If you live elsewhere, don’t worry – it’s easy for you too!
It’s no secret that eating gluten-free can be really expensive, and we rarely get the opportunity to buy gluten-free sourdough from the bakery – wouldn’t that be the dream? I have a joke that every time I visit San Francisco – where I lived for five years in my 20s – I put on the pounds because I bee-line straight for my favourite gluten-free bakery in the world, Mariposa. I literally gorge on pain au chocolat, cinnamon scrolls, apple turnovers, and ham and cheese pockets. It’s fundamentally unsustainable and also plain lame having to wait to go to San Francisco to eat my favourite foods. All the more reason to figure out how to make them myself, right?
The great news about this recipe is that it only requires one flour. If you’ve ever delved into the world of gluten-free baking, at this point you’re probably thinking, “But how can it possibly rise or taste good?” Don’t worry – I’ve got you covered. Please trust the process.
Hopefully, this post and recipe will make you feel less overwhelmed than I was when I first tried. I was so excited about seeing the rise that my husband, bless him, literally asked me to talk about something other than sourdough for the foreseeable future. It had consumed me for a whole 24 hours, lol.
A little bit of technical stuff before we dive into the recipe. There are some tools you might want to buy if you’re going to make this an every-week thing, but if you just want to try it for the first time and see if you like it, you can get by without all the fancy gadgets like a banneton (proofing basket), Dutch oven (cooking pot), dough whisk, etc. I’ll specify below the substitutions you can make if you aren’t ready to fully invest.
This loaf that we are about to make comes out at around $5.20 per loaf, which I think is pretty good. It’s healthy, nutritious, and as far as gluten-free bread making goes, pretty straightforward.
At this point, I’d like to say a special thank you to Krya at Simply Cherished Life for the original recipe and inspiration.
The last thing I’ll say is that the time investment is worth it. Once you make this recipe a couple of times, it will take you no time at all to prepare and have delicious gluten-free sourdough loaves that are crispy, fluffy, and delicious every week!
If you have any questions or suggestions, feel free to send me a message.
With joy,
Sian
What you'll need
2 x Mixing Bowls
Whisk
Kitchen Scale
Fork
Stand Mixer (you can use a whisk or wooden spoon but this makes it SO much easier for combining ingredients).
Plastic Spatula for when things get sticky (lol)
A clean surface you can work with
Napkin or clean tea towel
Dutch Oven at least 3.6L or a glass casserole dish with a lid will also work
Banneton Basket (or a colander with a tea towel liner on the bottom will also work)
Warm place to proof your bread
Baking Paper
Ingredients
Wet Ingredients:
330g Filtered or clean water, if you live on town supply I suggest using bottled or filtered water, if you don't this recipe might not work.
Additional 90g of water for later
20g Olive oil
20g Honey (softened)
20g Psyllium husk powder - this makes the gel that binds the bread, I don't recommend skipping it
Dry Ingredients:
340g 1:1 flour blend - I used Edmonds Plain Flour, you can use pams or any other 1:1 flour blend.
See the note below on Sorghum Flour. I typically use around 270g of 1:1 flour blend and the 70g of Sorghum Flour and works well but isn't essential.
8g Salt
5g Baking Powder (typically bread doesn't use baking powder but this helps it rise just that bit more)
265g Active Sourdough Starter
Flour for dusting your proofing basket and bench or working with the flour
Instructions
Here comes the fun part!
On your kitchen scale, add all of your wet ingredients zeroing out the scale every time. I highly recommend a scale for gluten free baking, it'll make your life so much easier. Not all ingredients are created equal and going by weight rather then the measuring cup size makes it easier to get things right, in my experience.
Once you have added in your Psyllium husk powder give the mixture a really good whisk to incorporate the ingredients and then set the bowl aside and wait for it to form a gel like texture.
While it is doing that, you can mix your dry ingredients.
On your kitchen scale, grab your other mixing bowl (I use my stand mixer bowl to save on dishes) and add your dry ingredients, again zeroing out every time. Once you've added everything, mix this well with a fork to ensure it's incorporated and you don't have any clumps.
Now in this same bowl add:
265g of your active Sourdough Starter
Your wet ingredient gel mixture
80g of your additional clean / filtered water
Add this to your stand mixer with the dough hook and mix on low to incorporate for 1 minute, then once it is forming a dough, move it onto mid-speed for around 3 minutes. You will have to pause halfway through and scrape the sides and underneath for some tiny bits of flour that will be hiding at the bottom. Here what I do is grab the remaining 10g of water and add that to the very bottom of the bowl which helps pick up any remaining flour.
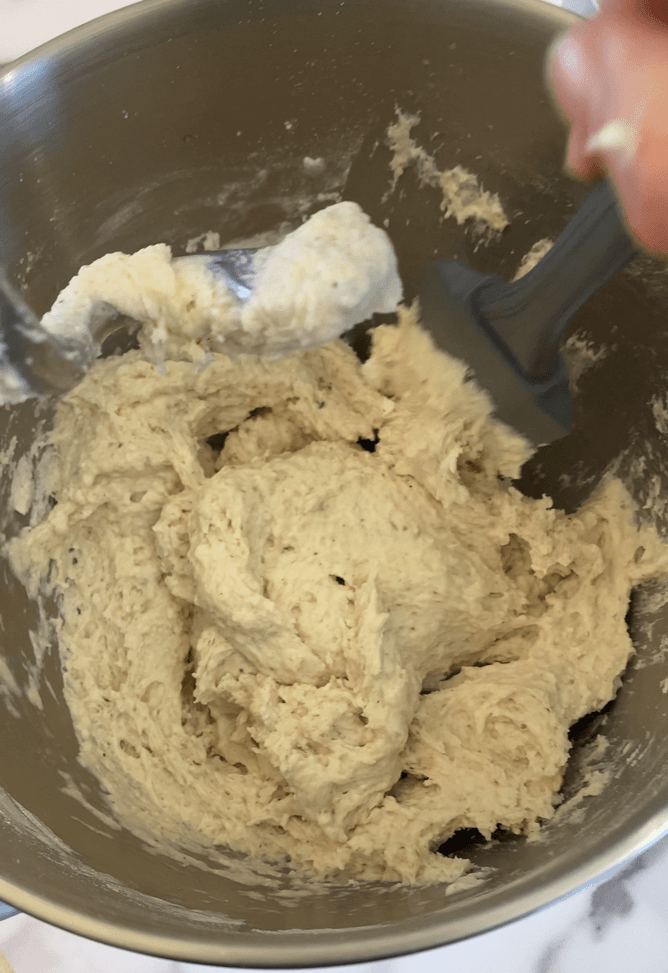
Full disclosure, if you are expecting a perfectly formed dough ball, lower those expectations. You mixture will be formed but sticky, hopefully not too sticky. See the video to see what is workable.
Once your dough is all mixed and has been mixed for around 3 minutes so it's nicely aerated you are ready for the next step.
Grab you Banneton Basket or the rising surface you are using and dust lightly but well with some rice flour, you want to get it in all of crevasses so that your bread doesn't stick to the surface, but can rise well. If you are not using a Banneton, my suggestion would be be a little more liberal, if you are using a Banneton, you can swirl the flour around the circle or surface making sure it's all covered.
Add some more flour to the bench.
Turn out your dough, you'll probably have to use your spatula to help, and scrape down the sides to get it all. Add water to the empty bowl immediately to save cleaning time later.
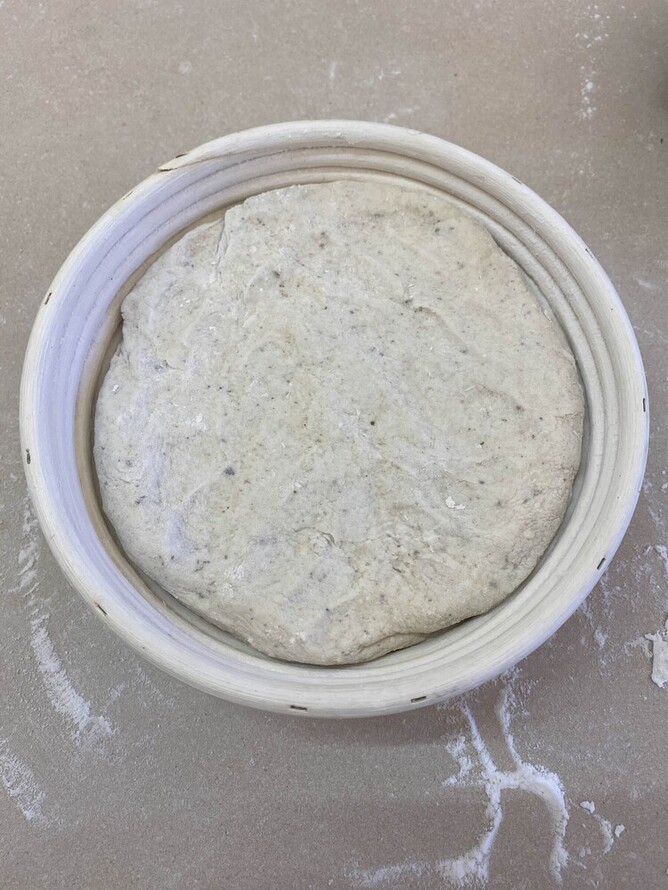
Once you have your dough on the bench, dust your hands lightly with Flour and gently knead the dough, I fold mind over a few times working out some of the stickness, then I fold in each of the corners and pop it in my Banneton Basket and smooth out the top so it's across the whole basket.
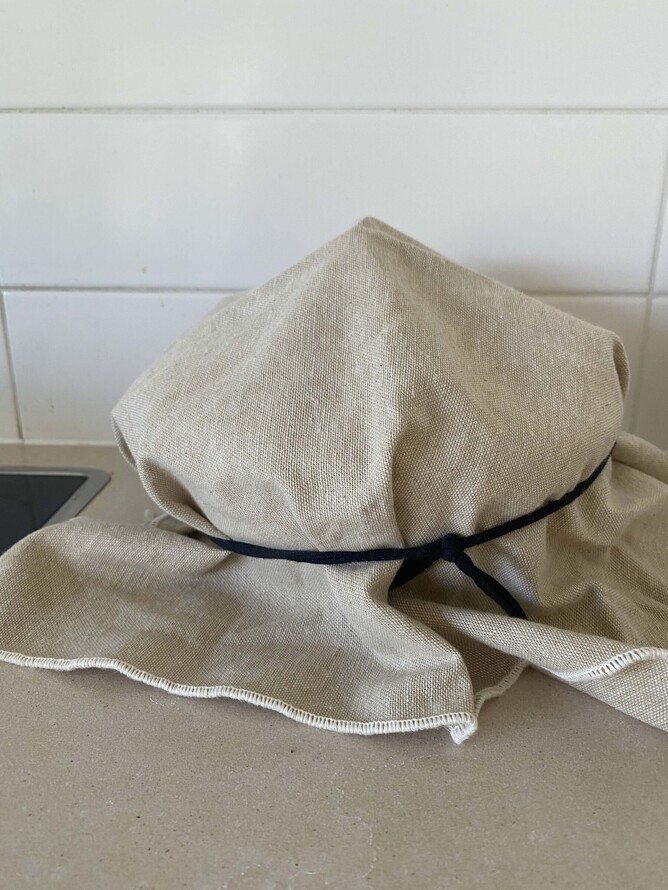
Next you'll want to take your tea towel or napkin and cover. Pinch the top of this up so that the bread has room to rise. Sort of making like a teepee. If you are using a colander to start with, you don't need to do this.
Next you need to put your dough somewhere to rise that is warm and also consistent if possible. I have been putting my oven on the 'warm setting' and the lowest temperature which I think is around 30 degrees celsius.
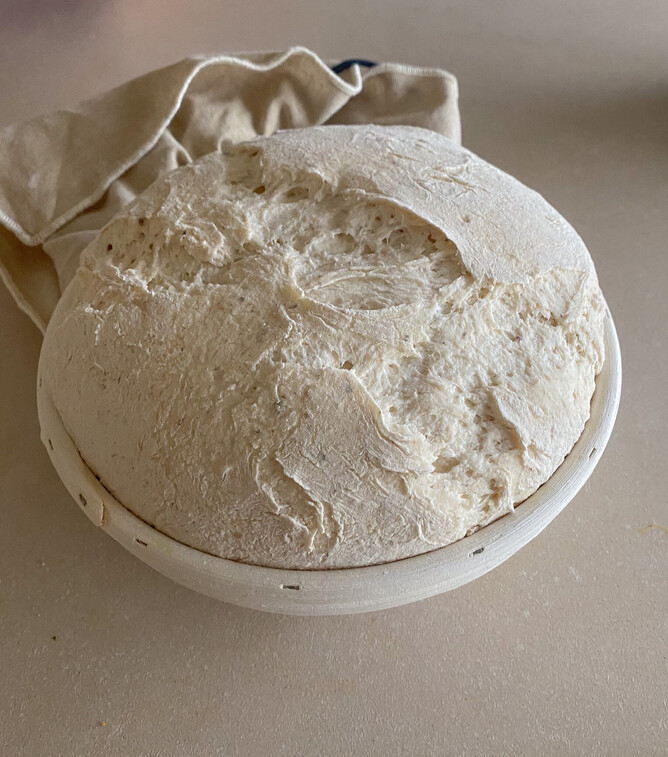
You need to let this rise for 6 hours. Don't miss this step or level of time. In my experience if you do, you won't get the rise and bubbles in your bread that you want.
If you are worried about the power bill or otherwise, you can also let this rise overnight in the oven with the oven off. And then use the above settings to do the final rise for one hour before cooking.
Though if you are just starting out I think you should understand what a good solid rise looks like before experimenting so you know what you are looking for.
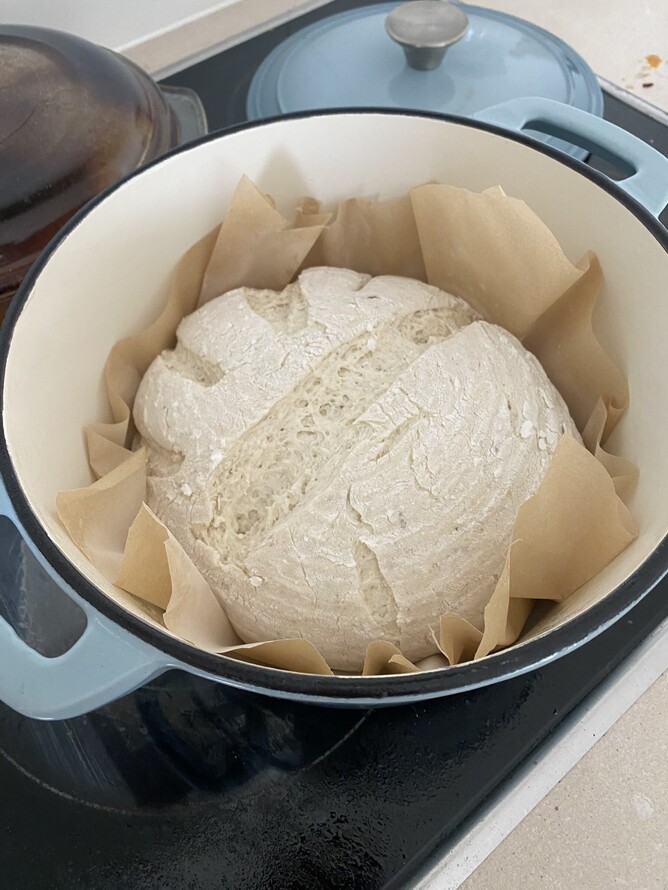
Once your 6 hours is up you should have some beautifully risen bread.
Preheat your oven to 220 degrees celsius on bake (not fan forced), add a water bath to the top shelf (oven proof bowl half filled with water), and dutch oven or glass casserole dish, you need something with a lid to keep the steam in for the first part of the baking process. As a tip learnt from a hard lesson, adding a small amount of oil to your dutch oven and wiping it around all internal surfaces will help stop it from discoloring so much while the bread is cooking. Dutch ovens are pretty hard to clean so this step is pretty helpful but not essential.
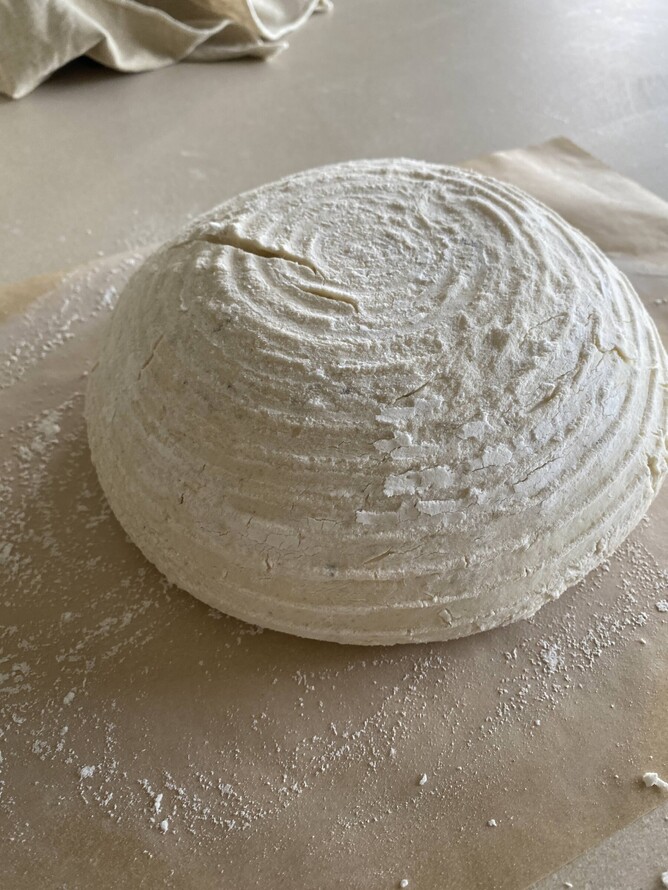
While that is warming up, grab a piece of baking paper, sprinkle it lightly with rice flour, and turn out your bread. All I do now is scoop underneath the sides (both ways sides then top and bottom) with both of my hands then get a sharp knife and cut in a curved line down the middle. Fancy people do this with a bread lame and make nice shapes, I just go with the dough and place a little cut not too deep down the middle or side.
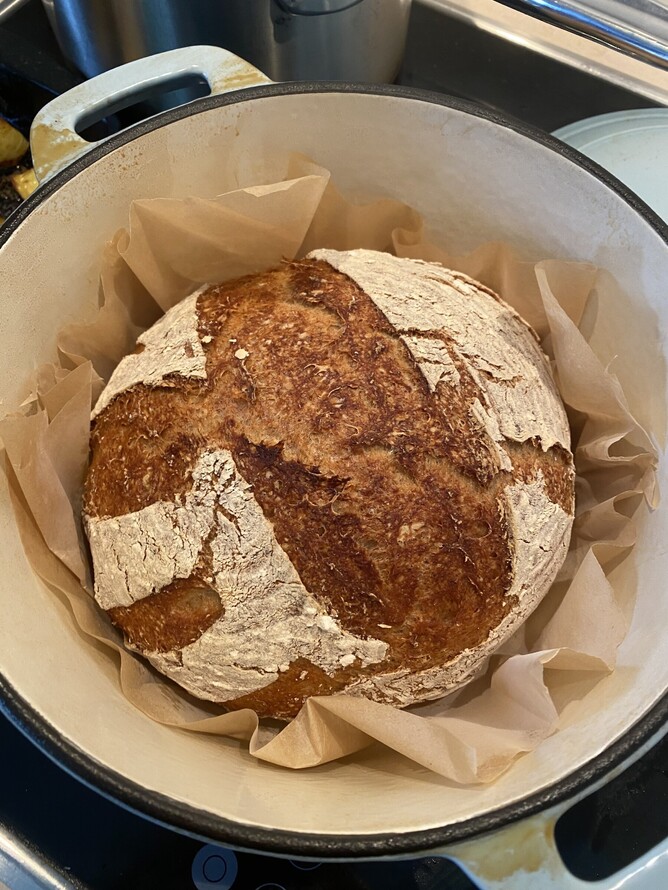
Now you can get your dutch oven out of the oven carefully as it'll be hot, and gently put your baking paper and bread into the pot, and put the lid back on.
Cook covered for 40 minutes.
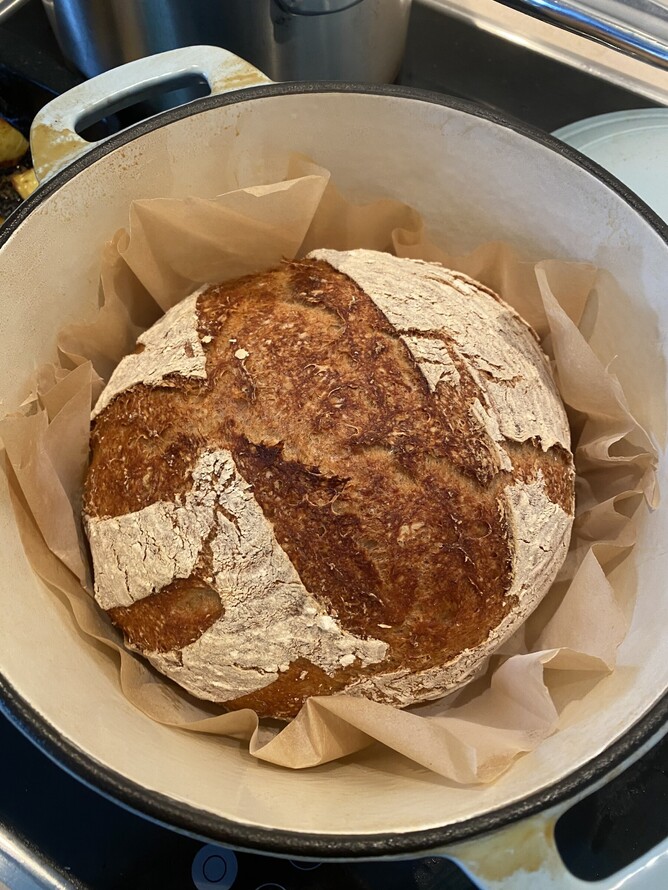
Take the lid off and cook for another 40 minutes.
You leave the water bath in the oven for the entire cooking time, make sure that it has water in it at the half way point.
Once the 40 minutes is up, let your bread cool in the dutch oven until completely cool, alternatively after around 20 minutes you can transfer it to a wire rack.
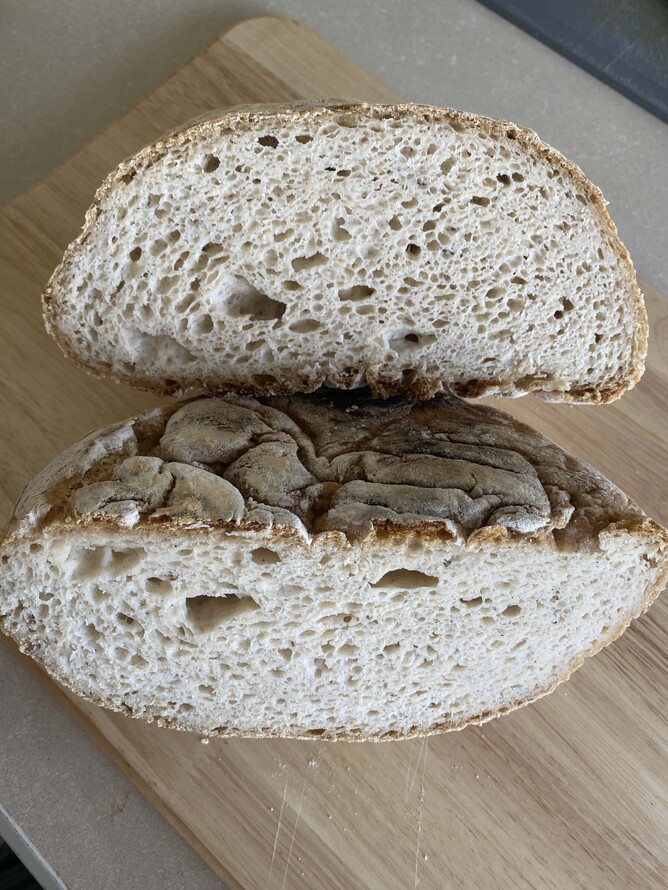
Don't be tempted to cut your bread while it's still warm as it's actually still cooking and apparently I don't know why, you need to let it cool completely otherwise you can ruin some of the bubbles in the bread or something. Resist, Resist, Resist!
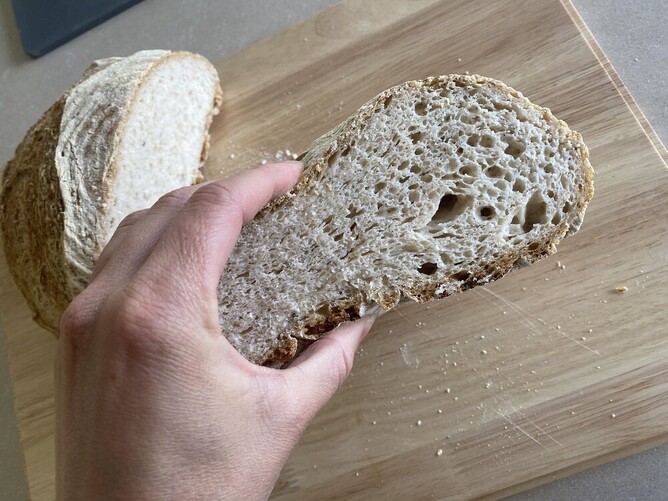
Once it's cooled you are good to go. Enjoy it with your favourite spreads, slice it thinly and make a juicy ham and egg breakfast sandwich or my personal favourite, dunk it in your poached eggs in the morning. This gluten free Sourdough bread is perfect fresh, toasted and also to use instead of crackers on a platter, a particularly useful tip if you are making your loaf round is to use the crusts for platter crackers.
I hope you enjoy your foray into Gluten Free Sourdough and that this recipe produced fruitful results for you!
If you have any questions please send me a message on any social platform or via email or my contact form, I'd love to make it easier, clarify anything thats not clear, even just receive photos of your bread as you make it!
I will be posting a video documenting the entire process from start to finish so keep an eye out for that coming soon.
One last thing, consider subscribing below for more delicious recipes,
With joy,
Sian
Some findings from my research and experimenting
A note on Sorghum Flour and why I think it's worth using two flours rather then one:
Now something I want to share with you is that you can make this recipe with a plain flour 1:1 flour blend that you buy at the supermarket or grocer, eg: Edmonds Plain Flour, Pams Plain Flour etc. In all my research I kept coming across people mentioning Sorghum flour having some potentially interesting properties to wheat flour (obviously without the gluten) that helps it bind moisture into the batter. Given we have no gluten proteins to hold the bread together I figured we might need all the help that we can get.
Sorghum flour's texture and density make it comparable to all-purpose wheat flour. One interesting property is that it helps to bind moisture into the dough or batter as well as promoting the formation of CO2 bubbles when making bread.
So while you can make this recipe with a 1:1 flour blend, I have found that adding a little bit of Sourgum flour into the mix makes it work better. So if you are willing and happen to live next to a bin in, wholefoods refill bulk bin place or happy to buy some off the internet I highly recommend the invest into getting some sorghum flour. You'll just have to trust me on this lol. I also googled what is sorghum? So if you are busy googling, you're not alone!
Having a Banneton and Dutch Oven really helps go from good to great. I didn't invest until I had nailed the recipe and was confident we were going to make this every week at a minimum.
You can either wait for a Briscoe Sale (Christmas is a good time) I highly recommend the Simon Gault range of Dutch Ovens as they have a high temp point (500 degrees celsius, or if you are fancym go for a Le Creuset. Alternatively, if budget is an issue you can find some really good deals on Facebook Market Place and Trade me for under $100.
You can order Banneton baskets online, you don't need the cloth thing that it comes with, I just got a napkin from Kmart and tied it with garden tie.
The 6 hour rise is important. At this point you can either bake it or put it in the fridge. I found putting it in the fridge before this to slow rise didn't yield the same results.
